The Web Savvy – CTA Widget is designed to give you maximum flexibility with the icons displayed. To use the widget go to Appearance –> Widgets and drag a the widget from the left side to the appropriate widget area on the right side. Then configure the widget as desired. You can use multiple widgets in the same widget area.
For example our Richard theme demo uses 7 CTA widgets in the Home Main Section widget area. You may use as many or as few widgets there as needed.
There are four ways you can include icons with the widget.
1. Built In Icons
Richard has several build in icons coded for use with the theme. You can select these directly within the widget settings via the Included Icon drop down. When you do, the theme will automatically use the icon you selected. You can optionally set that to “None” and use one of the other icon options below.
2. Google Material Icons
First you can use one of the Material Icons by Google. On that page search for the icon you wish to use. For example our theme demo uses the insert fingerprint icon in the first position. Follow the steps in this screenshot to get the HTML markup for your icon:

Once you have the HTML markup for your icon paste it in the HTML Icon location in your widget. For example:
<i class="material-icons">fingerprint</i>
3. Genericons
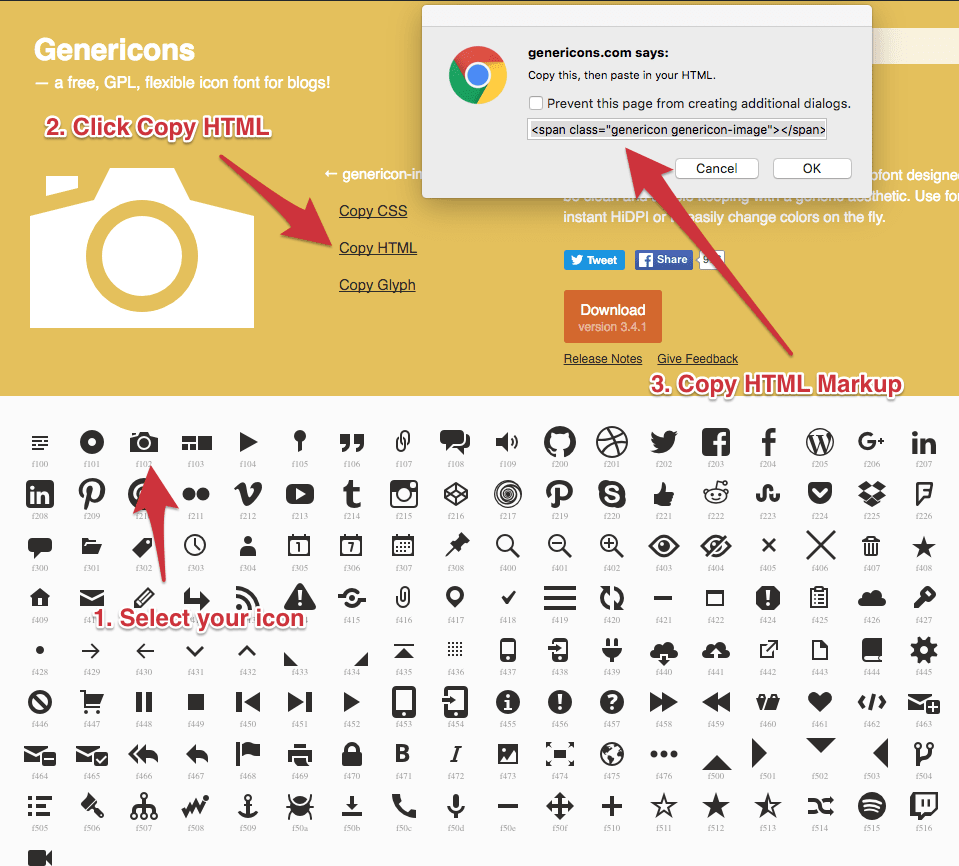
Alternatively you can use one of the icons by Genericons. To do so, go to the website and select an icon by clicking on it. Then click on the Copy HTML link beside the large icon at the top of the page.
Please follow the steps in the screenshot below to get the HTML markup:

The Genericons site produces HTML markup using a tag. You can simply paste that markup directly into the HTML Icon setting and it will work. However we recommend editing the markup you get from the Genericons site to replace the span tags with i (icon) tags instead per the example below:
OK: <span class="genericon genericon-image"></span>

Better: <i class="genericon genericon-image"></i>
