
Developing WordPress Locally – Part 3
Posted on November 25, 2013
This is the 3rd post in a 3 part series. You can find the first two posts here and here.
The previous two posts talked about getting set up to work on your WordPress website on your local machine, allowing you to build your site offline. In this final post in the series, I’m going to show you how to launch your new site live to the world.
Tools
My development is being done on a Mac, and my tools reflect that. If you’re developing on Windows, you’ll need to find alternate tools, but that shouldn’t be an issue.
Before we dive in
Since the process is a bit different for sites that are brand new Vs a site that already exists and you’re simply doing updates, I’ll go ahead and walk through both processes.
If you are not using DesktopServer, but are using something like MAMP for your local hosting, option 1 won’t apply to you, but, you should be able to use option 2 just fine.
I’ll also note that I am assuming you already have a hosting account and that you know how to install WordPress on it. Since most hosting companies these days have a one-click install for WordPress, that shouldn’t be a big deal. But if your host doesn’t offer one-click install, check out this article about installing WordPress.
And finally, since this is only an example walk through, I am not actually launching a site to a live domain. So in any screenshots where you see example.9seeds.com, that’s the location that is acting as our LIVE website URL.
Option 1: Brand New Website
Alright, you finally built your website and now it’s time to launch it. Let’s begin.
Step 1: Install DesktopServer plugin
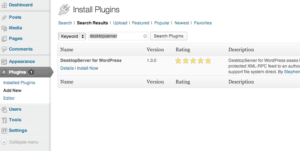
Log in to your live site, which at this point should just be a default WordPress install. Go to the plugins page and install the DesktopServer plugin. Once it’s installed, activate the plugin.
Step 2: DesktopServer
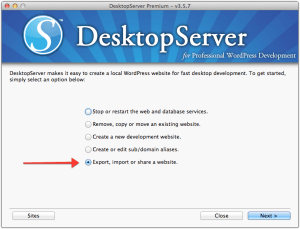
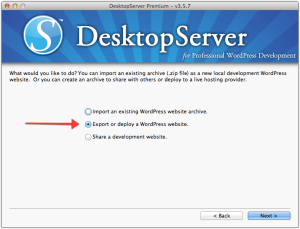
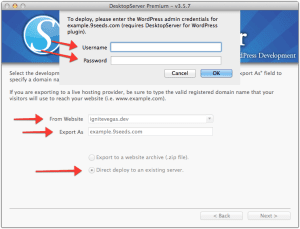
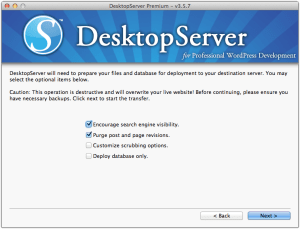
From the DesktopServer menu, select “Export, import or share a website” and click next. On the next screen, choose “Export or deploy a WordPress website.” and click next. On the 3rd screen select the “From Website” (your local dev install) and “Export as” (your live domain name) and then click the “Direct deploy to an existing server.” radio button. When you do, a pop-up will come up asking for your WordPress user credentials for your live site. Fill those in and hit submit. You will get a 4th page with options on what you want to do next. I leave things as they are with the top two options checked. Click next and then DesktopServer will get to work.
IMPORTANT: This is going to delete any WordPress data you have on your live site and replace it with everything you have on your local site. Fair warning!
Depending on the size of your site, this can take a while, so be patient.
Step 3: Save Permalinks
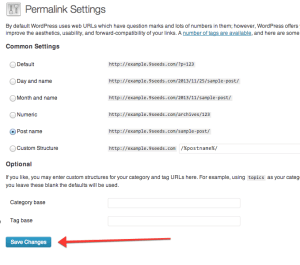
Once DesktopServer says it’s done, the final step in the process is to log in to the live WordPress site and go to Settings -> Permalinks and click the save button. This needs to be done so that WordPress will generate the .htaccess file for you so your permalinks will work.
Remember, your username and password to access the site will be the same as it is to access your local development site.
That’s it. Your new site is ready to go!
Option 2: Updating an existing site
In this version, we’re going to assume your site is already live, but you’ve now made some changes and you want to push those up to your live server.
Step 1: Transmit
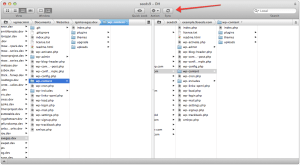
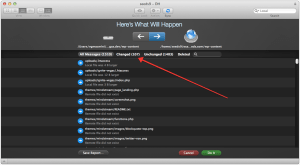
First up, we need to upload any new themes, plugins or images that we’ve created locally. I do this by connecting to my live server with Transmit and highlight wp-content folder on both local and live. I then click the Sync button.
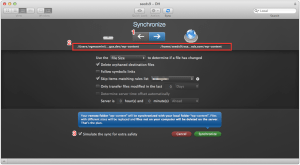
On the next screen, you’ll want to make sure that the arrow (1) is pointing from your local server to the dev server. The proper folders (2) have been selected. Simulate the sync (3) is selected. Click the Syncronize button and Transmit will compare the local and live folders and report back what has changed. The great part about the sync tool, instead of having to upload all 1500+ files, it’s only going to upload the 107 files that are changed. This is a big time saver.
Step 2: WP Migrate DB Pro
When using WP Migrate DB Pro, it’s important to remember that this step is going to wipe out your existing database. So, if you have a ton of traffic and comments and don’t want to lose those by pulling a copy of your local database up to your live database, you may want to instead simply open two browsers and copy/paste from the local to the live any changes you’ve made. BUT, if you are fine with making your live database match your local database, then this is the process for you.
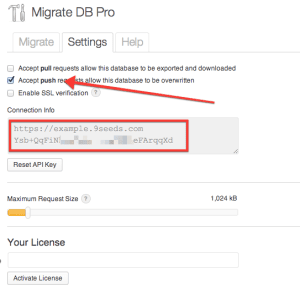
On the live site, go to Tools -> Migrate DB Pro. On the Settings tab, check the box for ‘Accept push requests’ and then copy the connection info to the clipboard.
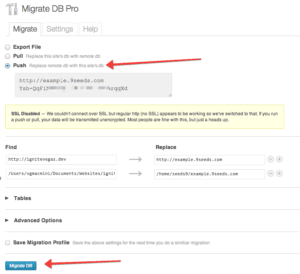
On the local site, go to Tolls -> Migrate DB Pro. On the Migrate tab, select the “Push” radio button and paste in the connection info from the clipboard. Then click Migrate DB.
You are done! Your live site should now match your local site.
I hope you’ve enjoyed this series on Developing WordPress Locally. If you have any questions or comments or just want to share your own process, please leave a note in the comments!
Want More?
– Read Part 1 of this series
– Read Part 2 of this series
– Sign up for our newsletter

Speak Your Mind