
Developing WordPress Locally – Part 1
Posted on November 10, 2013
One question that I get asked a lot is “What is your process for developing sites on WordPress?” I get asked it so often, I figured it was about time that I write it up. Plus, it’s a great question. It’s one I love to ask other developers, too. I don’t think there is such a thing as a perfect setup. I don’t submit this as the best way to develop locally. I submit it solely as how I develop locally. Your milage may vary.
This will end up being a 3 part series of posts. Part 1 will cover starting from scratch. Meaning, creation of a brand new WordPress site. In Part 2 I will cover how to set up a local development site for an existing website. And, in Part 3, I will talk about how I deploy sites live after we’re done.
Tools
I use a number of tools, all of which are Mac based. Some have PC versions and some you will need to go in search of a substitute if you aren’t on a Mac. Some of the tools I use have both free and paid versions. If there is a paid version, that’s the one I’m using. Keep that in mind if you’re not seeing the exact screen or menu items, you may just need to upgrade. These are tools that are going enable you to do the work that makes you money. Pay for them. </soapbox>
That being said, here’s the list of tools I used (in no real order):
- Desktop Server
Used for setting up and running WordPress locally. It handles the setup and configuration of PHP, MySQL and Apache. - Tower
- Used for pushing code to our Git repository and to our staging site for client review.
- Terminal
- Used for two quick pieces of setup.
- Finder
Used to copy a bunch of files. - Chrome
Used for installing WordPress general browsing, of course. - PHPMyAdmin
Used to set up a database for the local site. - bitbucket.org
Our online Git repository. I’ll refer to this as a ‘repo’ or ‘bitbucket’ interchangeably throughout the post. - wpengine.com
Where we host the staging site for clients review. I’ll refer to this as the ‘staging site’ throughout the post.
A quick side note about WPEngine and what I refer to as a staging site. WPEngine offers a simple way of copying your live site to a secondary location called a staging site for the purpose of doing testing. However, my use of the word ‘staging site’ in this post does not specifically mean that I’ve copied the ‘live’ code to a ‘staging’ area. For my specific use, I rarely have the need for both a live and staging version on WPEngine during the development process. So, I rarely use the WPEngine ‘staging’ functionality and instead use what would be considered the ‘live’ environment as a staging environment. So when I say ‘staging’, I simply mean ‘wpengine’ in general. How you decide to use WPEngine and their live/staging environments is entirely up to you.
Before you get started
In order to use Git for pushing your code to your repo and to your staging site, you will need to set up SSH keys and you need to submit your SSH public key to WPEngine. There are excellent tutorials for doing both of those things here and here, so I won’t bother explaining that portion. Just know that I assume you have already created SSH keys and have submitted them to WPEngine before moving forward.
Ready, Set, Go
OK, we’ve got our tools. We’ve got our accounts. We have a client. It’s time to get started.
Hey now, another side note: I’m going to break up the process in to a number of ‘steps.’ Each time there’s a new step, that simply means we are changing applications. In my head, this makes the most sense for breaking up this post in to digestible segments.
Step 1: Desktop Server
I’m about to walk you through what is going to look like the most complicated way to install WordPress ever. But I promise, there is a method to my madness.
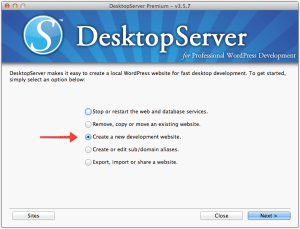
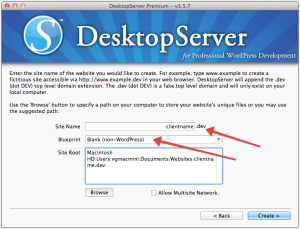
In Desktop Server, start by choosing the ‘create a new development environment’ radio button. On the next screen you will enter a site name (I typically use the client’s name or the actual domain name if we know what it’s going to be), and in the Blueprint dropdown, I choose ‘Blank (non-WordPress)’. We’ll install WordPress manually in a minute. What we’re really doing at this point is setting up the local DNS entries and folders so we can access the site in a browser.
Step 2: Terminal
One thing that Desktop Server does that I wish I could change is that it creates an index.html file inside the new site folder when you create a blank site. It makes sense for them to do it as it closes the loop for users to validate that the setup worked. But for me, it creates an extra step.
To remove the index.html file, I use terminal and run the following two commands:
- cd /websites/clientname.dev/
- rm index.html
Your path name will likely be different. I set up a symlink to point /websites/ to my DesktopServer websites folder.
I use Terminal instead of Finder because when you use ‘Move to Trash’, your Mac will add a DS_Store file to the directory. For an upcoming step we need to have the folder be completely empty. If you know of a better way, please leave a comment below.
Step 3: bitbucket.org
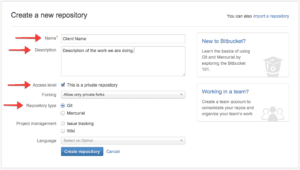
Next I set up a new repository on our bitbucket.org account. Click the ‘Create’ button and on the resulting page all of the presets are fine. I fill in the name for the new repo and (sometimes) I fill in the description and click the ‘Create Repository’ button to continue.
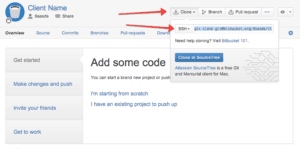
Once the repo is created I select the Clone button and switch the second dropdown to SSH. In the screenshot below you’ll see that in the highlighted area it says ‘git clone git@bitbucket…’. We don’t actually need the ‘git clone’ portion. We want to copy everything after that. In this example, that’s going to look like this: [email protected]:9seeds/client-name.git Once we have that copied to the clipboard, we’re done with bitbucket for now.
Step 4: Tower
From the Tower dashboard click the ‘Clone Remote Repository’ button. Paste our clipboard in to the top box titled ‘Repository URL’. The Bookmark Title is for your use only. You can change this to be something human readable. In the Authentication dropdown select ‘Private Key.’ and in the ‘Clone To:’ box, click the Browse button and select the /websites/clientname.dev/ folder.
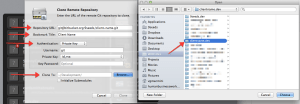
If you try to clone the repository in to a folder that is not empty, Tower will not let you move forward. This is where Step 2 came in to play.
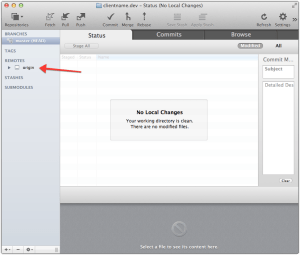
If you double-click the new Client Name repo in Tower, you should see a blank repo that shows one item under the ‘Remote’ section called origin. This is our BitBucket repo. It will look like this:
Step 5: WPEngine
Now we’re going to set up our staging area for our clients to view the work we do. I log in to my account at my.wpengine.com and click the ‘Add Install’ button. In the pop-up window, fill in the Installation Name field and click ‘save install’.
IMPORTANT NOTE: the install names have to be unique across all of WPEngine. Because of that we add ‘9s’ to the end of all our install names. We do this for 2 reasons; 1) we know it’s going to be unique, 2) If you use your client’s name/domain/abbreviation, and later your client tries to use it, they won’t be able to. That seems rather rude. Make yours unique.
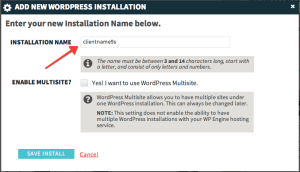
Next, we need to request Git Push access for our new install. Hover over the Support link and click the ‘Open a Ticket’ link. You will then need to click the ‘No, open a support ticket’ link. Next, you will need to authenticate with Zendesk (follow the onscreen instructions. This has changed a couple times so I don’t want to post something that may be immediately outdated) and you’ll end up getting to the Open a Support Ticket page. You will need to fill out the Subject, Details and select which Install you want the access for. See the screenshot for an example of what to write.

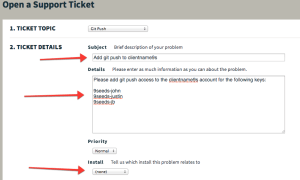
Once you submit the request to WPEngine, it will take some time before you receive an email back from them. I’ve had it take 3 minutes, 24 hours and all points in between. We don’t typically need this immediately, so we are safe to move on to the rest of the setup while we wait.
Step 6: Chrome
We are almost ready to install WordPress. But before we do, I like to add the .gitignore file to our empty folder. This file tells Git which files you want it to skip when pushing data to your repository. For me, I like to ignore all the WordPress core files and things like the /uploads/ folder. Mainly I want to keep everything in the /wp-content/themes/ folder and /wp-content/plugins/ as these are the two locations where I’m generally going to do all of my work.
If you read the page where WPEngine talks about Git, you may have seen the section talking about .gitignore. They have two starter files that you can use. One which keeps the WP files in your repo and another that ignores the core files. It’s that second one that I’m going to use. You can find it here.
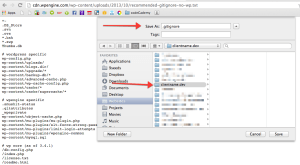
Browse to that page and choose ‘Save page as’ from the menu. In the save dialog box, rename the file to .gitignore and select the clientname.dev folder and click save. You will get a warning about file names starting with a dot not being visible. That’s fine, click OK and continue.
Note: Be sure it doesn’t add .txt to the end of your file name. It needs to be named .gitignore and not .gitignore.txt
Step 7: Finder
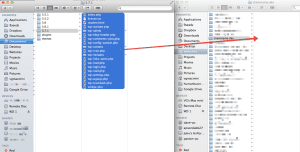
We’re finally going to start the WP install. I have already downloaded the latest version of WordPress (3.7.1 as of this writing). In Finder I copy all the files and paste them in to the /websites/clientname.dev/ folder.
Step 8: PHPMyAdmin
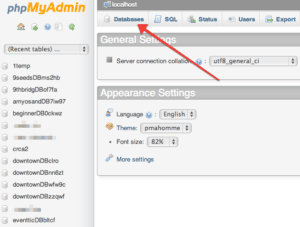
To set up a database for our new site, I use PHPMyAdmin. When you installed DesktopServer, they also set up PHPMyAdmin for you. You access it in a browser by going to http://127.0.0.1/phpmyadmin/
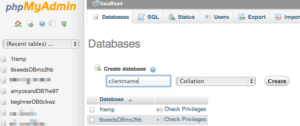
First I click the ‘Databases’ button at the top. On the resulting page I create a database using a name that will be easy to remember. In this case I’ll use ‘clientname’.
Step 9: Chrome
Now it’s time to install WordPress proper. In a browser window visit the URL for your new site; http://clientname.dev/. If you have never installed WordPress manually, it’s very simple. If you have, you already know that. Here’s the basic steps:
Screen 1: Click ‘Create a Configuration File’ button.
Screen 2: Click ‘Let’s Go!’
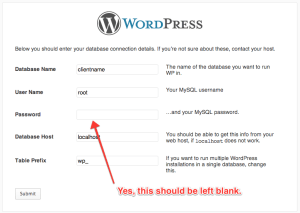
Screen 3: Fill in the Database Name, User Name and Password fields. It should look like the screenshot below.
Screen 4: Click ‘Run the install’
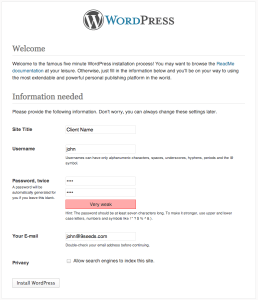
Screen 5: Fill in the Site Title, Username, Password, Email fields. I uncheck the ‘Privacy’ checkbox, but I don’t think it matters much either way.
Screen 6: Technically you’re done. Log in if you’d like.
Step 10: Tower
If you open up Tower again, it’s going to look like this:
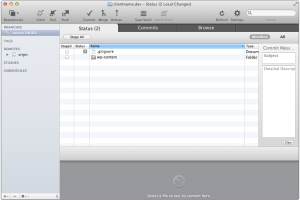
You can see our .gitignore file and the wp-content folder. Perfect. We’re going to commit this as our initial release. We do that by first clicking the ‘Stage All’ button and then clicking the ‘Commit’ button at the top. In the pop-up window we’ll provide a descriptive submit message before we continue.
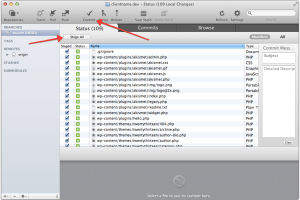
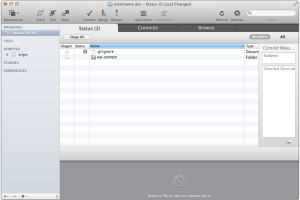
Then, the next step is something we will only do one time ever. We’re going to drag our ‘Master’ branch on to our ‘origin’ in the remotes section. Here’s a video example of what I mean.
What this is doing is making it so that our Bitbucket repo is the place where files will go when we click the ‘Push’ button in the future. I feel like this needs more explanation, but that could turn in to a whole other blog post. Let me just say that:
Commit = store stuff in your local repository (as in, on your computer, not on bitbucket/wpengine)
Push = send the files somewhere else. (we want our files to go to bitbucket for now. We’ll deal with wpengine shortly)
If you were to go to Bitbucket now and look at the repo you created, you should now see something similar to this:

Step 11: Terminal
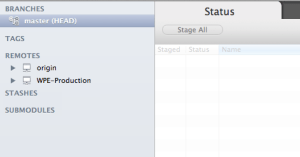
I’m going to assume that enough time has passed that you’ve received the confirmation from WPEngine about your Git access. So the next step is to add WPEngine as a new remote location for our code. To do this I use the 4 commands below inside a Terminal window:
cd /websites/clientname.dev/

git remote add WPE-Production [email protected]:production/clientname9s.git

git config remote.WPE-Production.gtSSHKey ~/.ssh/id_rsa

git config remote.WPE-Production.gtAlwaysFetchAllTags true
Keep in mind that you will need to modify the first 3 lines to point to your proper directory name on line 1, your wpengine install name on line 2 and your SSH Key ID on line 3 (if you used something other than id_rsa)
If you open Tower again, instead of seeing one remote, you should now see two. Like this:
Step 12: Sublime Text 2
Hey, it’s time to go and write some code. I’m going to assume you already know how to do that part. For my example, I’m going to go create a new theme for my client. I’ll do that by creating a folder at /websites/clientname.dev/wp-content/themes/client-theme/
Step 13: Tower
Now that we created our theme, we’re going to do two things. First we’re going to push our theme to Bitbucket for safe keeping. Then we’re going to push our changes to WPEngine to show the client. To do this, first we need to stage and commit our files just like we did in Step 10. But this time, instead of dragging ‘master’ on to ‘origin’, we only need to click the ‘Push’ button up top and select our destination.
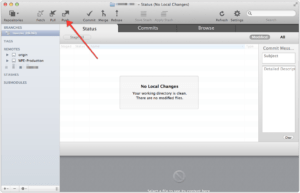
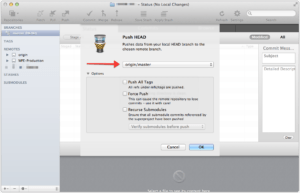
Now click ‘Push’ again, but this time choose ‘WPE-Production/master’ from the dropdown:
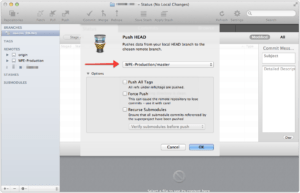
That’s it. You are all set up to work on your site. You can now loop through steps 12 and 13 as many times as you need until the project is finished.
If you have any questions about the process, or if you write up your own process and want to share, please leave a comment below.
Want More?
– Read Part 2 of this series
– Read Part 3 of this series
– Sign up for our newsletter

Deploying WordPress websites on WPEngine with git is an excellent feature that I've been using without issue. They recently introduced the ability to administer your git developer keys through their web interface. As you mentioned, previously you needed to open a support ticket, and have a technician manually add your key to gain push access to the repo. This new feature makes working with git on WPEngine an even more powerful tool: http://wpengine.com/2014/02/06/wp-engine-introduces-git-administration-user-portal/
Great tutorial and well explained. Is it possible to do step 11 using my digital ocean vps and my server config server pilot.io rather than wpengine? I found this article but not sure if it relates? I have a fairly good understanding but this is new territory for me. https://serverpilot.io/community/articles/how-to-automatically-deploy-a-git-repo-from-bitbucket.html Would this allow me to do the same?