
Developing WordPress Locally – Part 2
Posted on November 17, 2013
In Part 1 of this series I shared the process I go through to set up a local WordPress workspace for developing client websites when we are starting from scratch. In this post I will show you how I set up a workspace for clients who already have an existing website.
While I am explaining this as a process for working on a client’s website, this is also a great way to run a development version of your own website. It will allow you to try out plugins and themes using your real data so you can see exactly how it will work BEFORE you push it live.
Since many of the tools and steps I am going to use are the same as they are in Part 1 of this post series, I may gloss over details that are covered more in-depth in the previous post.
Tools
As I said before, I am developing on a Mac. Many of the tools I use are Mac specific. If you are on a PC, the concepts will be the same, but you may need to find a comparable tool.
Here’s the list of tools I’ll be using:
Before you get started
By now you should have already collected the FTP information and WordPress admin login credentials for the site you’re working on. If not, do that now. I’ll also mention that having a BitBucket account isn’t a requirement for what I’m going to show you here, but it is part of MY process, so I’m leaving it in, but you can skip that part if you’d like. OK, I think we’re set. Let’s do this!
Aaaaand Go
Just like I said in the previous post, I’m going to break up the process in to a number of ‘steps.’ Each time there’s a new step, that simply means we are changing applications. In my head, this makes the most sense for breaking up this post in to digestible segments.
Step 1: Desktop Server
First thing we’re going to do is set up a copy of WordPress to work on locally. In DesktopServer, start by choosing the ‘Create a new development environment’ radio button. On the next screen you will enter a site name and in the Blueprint dropdown choose the latest version of WordPress and click continue. After the install is complete, click Done and you’ll see the congratulations screen with a link to your new local WordPress install. Click the link to finish the WordPress install in the browser.
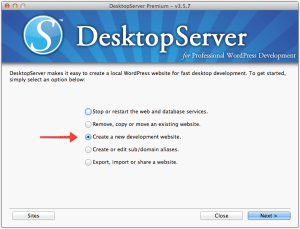
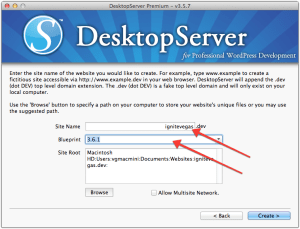
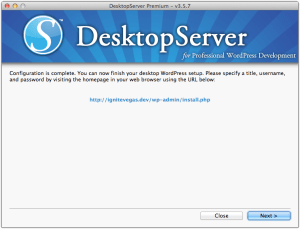
Note: DesktopServer lets you create your own ‘Blueprints.’ These are folders that contain the default WordPress install and you can add your own default themes and plugins. As an example, I have the latest version of Genesis in the theme folder and I have a handful of plugins I use for development in the plugins folder. This is a nice time saver when setting up a dev environment.
Step 1.5
You may have noticed in my screenshot, my Desktop Server Blueprint is out of date. Because I installed an older version of WordPress, and some of my plugins are out of date, my next step is to log in to my new local WordPress install and update WordPress core and all plugins directly from the WordPress admin area. Just because we are working locally, there’s no need for us to jump through any crazy hoops to update WordPress. I love that about Desktop Server.
Step 2: Transmit
In Transmit, I create a new connection profile and fill in the details for my client’s website. I then connect to the server and I download everything from their wp-content/themes/ folder and wp-content/plugins/ folder. I store these in the matching folders inside our newly created website on our local machine.
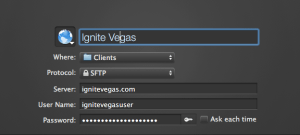
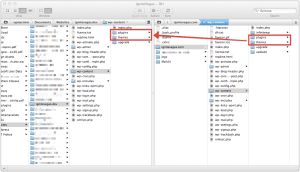
Note: If the site I am working on doesn’t have a huge amount of files in the uploads folder, I will go ahead and download that now as well. But, if it does have a large number of files, I will instead use the Uploads By Proxy plugin, which I will explain in a later step.
Step 3: WP Migrate DB Pro
If there is one plugin that saves me the most amount of time, it has to be WP Migrate DB Pro. We are going to use the plugin to mirror our live site on our local install.
Start by installing the WP Migrate DB Pro plugin on both your live site and your local installation.
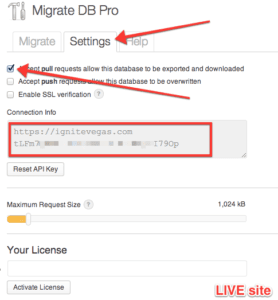
On the live website, in the WordPress dashboard, go to Tools -> Migrate DB Pro. Click the Settings tab at the top. On the resulting screen click the “Accept pull requests allow this database to be exported and download” checkbox. Then, highlight and copy the information in the ‘Connection Info’ box.
On the local website, in the WordPress dashboard, go to Tools -> Migrate DB Pro. On the Migrate tab, click the ‘Pull’ radio button and paste in the connection info you copied a second ago. You do not need to click the ‘connect’ button. After a second you should see a screen that looks similar to this:
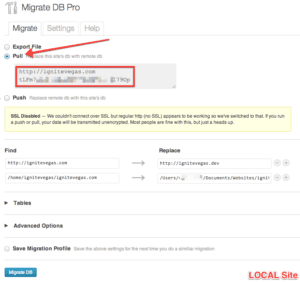
Click the ‘Migrate DB’ button at the bottom and the plugin will start pulling a copy of the live database and using it to replace your local database. It will also update all the website URL references and path references based on what it auto-detected. You can see that in the screenshot just above. When it’s done, you’ll see a confirmation message like this one:

47 seconds. Done and done.
Important Note: Your local database and your live database are the same. This means that the username and password that you set up locally in Step 1 above will no longer work. You need to log in using a username/password that existed on the live website.
At this point, we’re done touching the live website. All further steps in this process are done on your local WordPress installation.
Step 4: Uploads by Proxy
If you downloaded the /wp-content/uploads/ folder in step 2, you can skip ahead to Step 5.
When a client has a large number of files in their uploads folder, rather than spending time waiting for them all to download and taking up space on my hard drive, the Uploads by Proxy plugin comes to the rescue. Install the plugin and activate it.
Open Sublime Text 2 and open your wp-config.php file located in the root folder of your WordPress install. Add the following two lines to your wp-config file, just about where it suggests you stop editing.
define(‘WP_SITEURL’, ‘http://ignitevegas.com’);
define(‘UBP_SITEURL’, ‘http://ignitevegas.com’);
Like this:
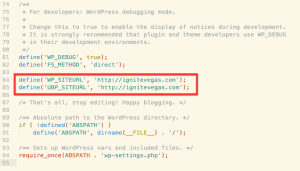
Now our local site is displaying images directly from the live site. Here’s a before and after:
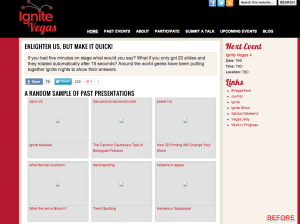

OK, one final warning about Uploads by Proxy. If you are planning to do development on your local computer from a location where you won’t have an internet connection, then using Uploads by Proxy is a bad idea! Go back and download the uploads folder instead.
Technically speaking, you are ready to start working on your site. However, before I get started I like to create a BitBucket repo and store a copy of the site files as they are now before I do any work. It’s always nice to have a rollback point in case something goes horribly horribly wrong. That being said…
Step 5: Tower
Before I create my local repo, I save a copy of this file in to the root folder of my local WordPress install and rename it to .gitignore (It has to be named exactly like that. See the explanation in the first post if needed.
From the Tower dashboard, click the “Create Local Repository” link. In the pop-up, click Browse to select the root folder for your local WordPress install. Give it a proper title and click OK.
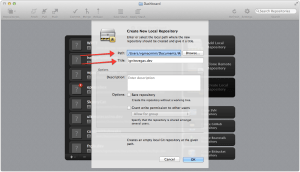
Once the repo is created, double click it and you should see something similar to this:
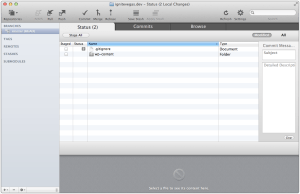
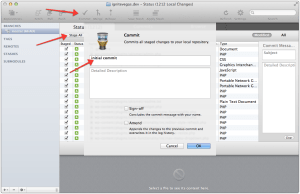
I then do an initial commit of the .gitignore file and the wp-content folder. I do this by clicking the ‘Stage all’ button, clicking ‘commit’ and in the pop-up I type in ‘initial install’
Step 6: BitBucket
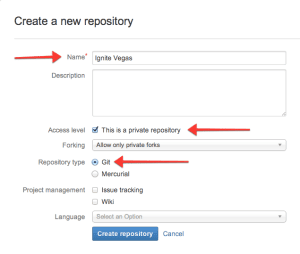
In my bitbucket.org account, I create a new BitBucket repo. Like this:
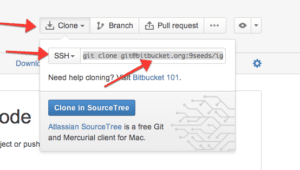
Once the repo is created I select the Clone button and switch the second dropdown to SSH. In the screenshot below you’ll see that in the highlighted area it says ‘git clone git@bitbucket…’. We don’t actually need the ‘git clone’ portion. We want to copy everything after that. In this example, that’s going to look like this: [email protected]:9seeds/ignite-vegas.git Once we have that copied to the clipboard, we’re done with bitbucket.
Step 7: Tower
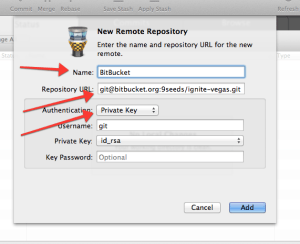
Now I’m going to add BitBucket as a ‘remote’ so that I can store a copy of the code in a central location for myself and my team to access later on. I do this by right-clicking on ‘Remotes’ and in the pop-up, I fill type in ‘BitBucket’ as the name of the remote and then paste in the info I copied in the previous step. I select Private Key from the dropdown and click OK.
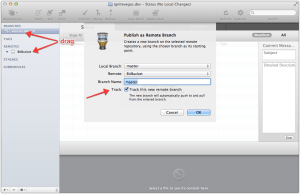
The last step is to drag the ‘master’ branch on to the ‘BitBucket’ Remote. This will do an initial push of our local repository up to BitBucket. In the pop-up window, make sure to have the ‘Track this new remote branch’ checked and then hit OK.
Alright, NOW you are really done. Now it’s time to open up your editor and get to work.
Sign up for the 9seeds.com newsletter to make sure you catch next week’s final post in the series where I’ll cover how we take the work we’ve done locally and push it to the live server.
Want More?
– Read Part 1 of this series
– Read Part 3 of this series
– Sign up for our newsletter

Speak Your Mind